
Step 1 — Install NZBGet
Open nzbget.com and grab the build for your platform:
- Windows / macOS / Linux: download the installer and run it.
- Synology / QNAP NAS: install via Package Center / App Center.
- Raspberry Pi or other Linux ARM: available as a Docker image or via your distro’s package manager.
NZBGet runs as a background service and is configured through a web interface, just like SABnzbd.
Step 2 — Open the web UI
By default NZBGet listens on port 6789. Open http://localhost:6789 in your browser (or http://<your-NAS-ip>:6789 for a NAS install).
The default login is username nzbget and password tegbzn6789. Change this in Settings → Security as soon as you’re in — otherwise anyone on your network can access it.
Step 3 — Add the XS News server
Go to Settings → News-Servers. There’s usually a placeholder Server1 entry — edit it (or add a new one).
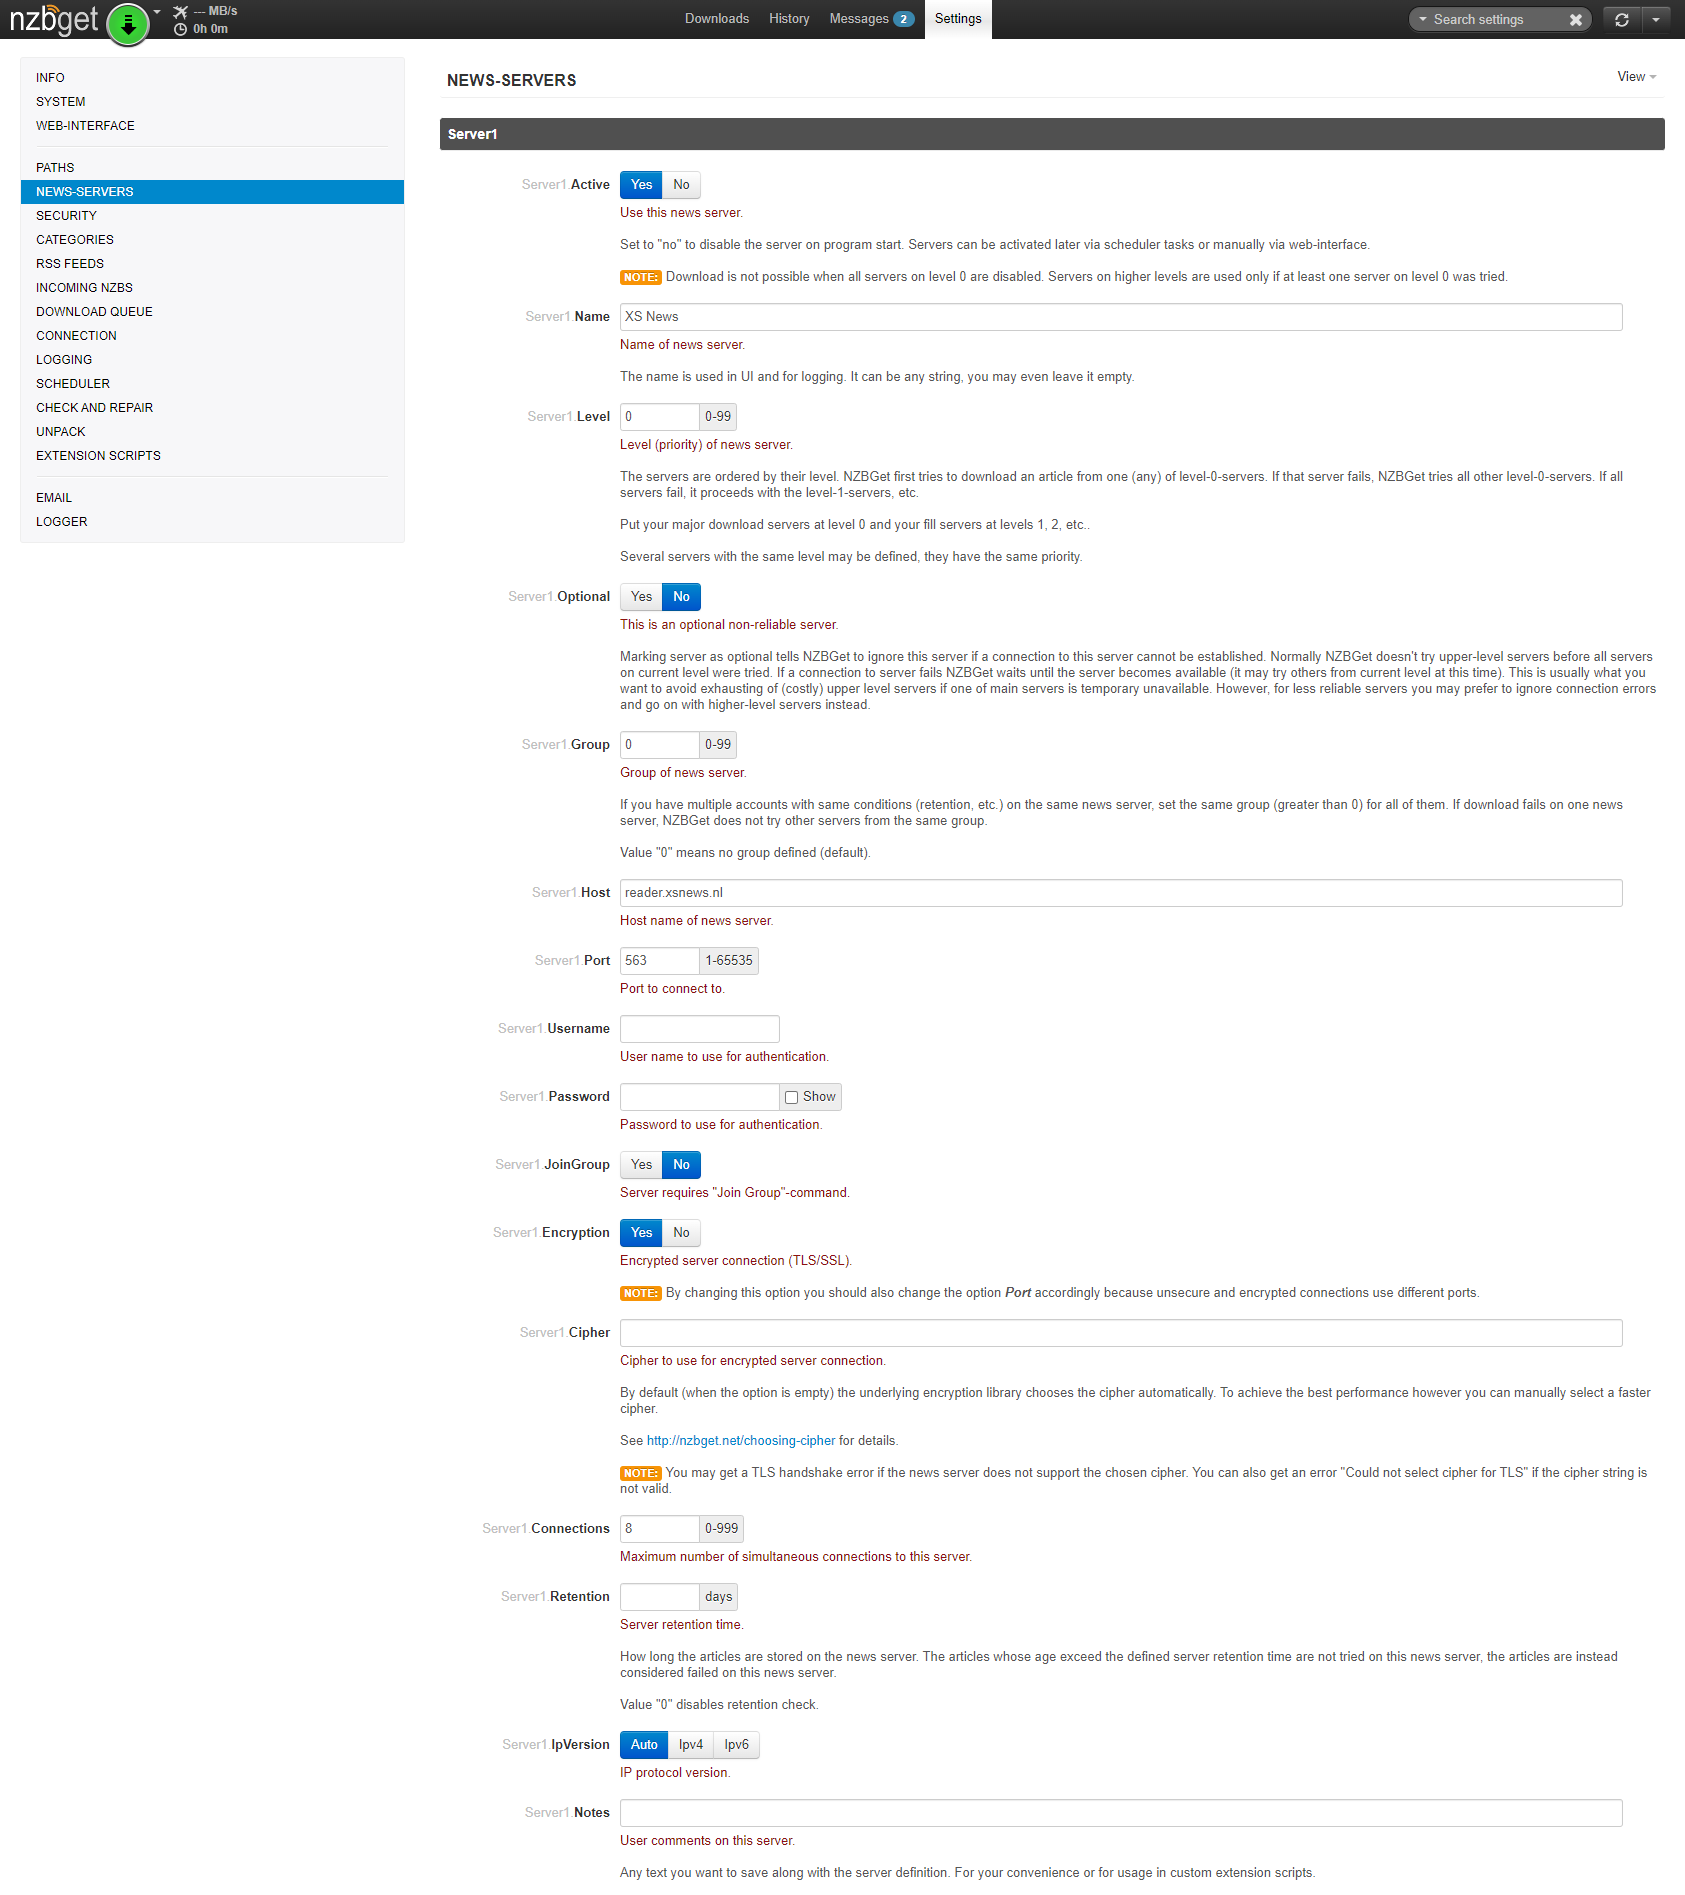
Step 4 — Save & reload
Click Save all changes at the top of the settings page. NZBGet will prompt you to reload the service — do it. After it restarts, the dashboard should show your XS News server as connected.
You can verify by visiting Status in the side bar: the active server count will match your configured connection limit.
Step 5 — Optional polish
- Download folder: Settings → Paths — set
MainDirto a comfortable location (a big disk on your NAS for example). - Post-processing: NZBGet automatically repairs (PAR2) and unpacks archives. You can extend it with scripts under Settings → Extension scripts — useful for renaming and moving finished files into Sonarr/Radarr-style libraries.
- Categories: add categories for movies/tv/etc. under Settings → Categories to keep things organised.
Step 6 — Start downloading
Head to Downloads, click Add Files and drop an .nzb in. NZBGet will queue it, fetch it through XS News, verify it with PAR2, unpack it and drop the finished files in your configured directory — all unattended.
Troubleshooting
- "Authentication failed" — copy & paste your credentials. Verify host =
reader.xsnews.nland port =563. - Can’t reach the web UI — on a NAS, check the NZBGet service status in your NAS’s app center. On Linux, confirm the daemon is running:
nzbget -Dorsystemctl status nzbget. - Slow downloads — raise the connection count up to your plan’s maximum. NZBGet is so light that the only cap will be your own internet speed.
- Forgot the web UI password — SSH into the device and edit
nzbget.confdirectly to resetControlPassword.
Still stuck? Contact support →
